

73% of car owners pay $150+ for headlight restoration they could do themselves.
The same results cost under $20 and take 30 minutes with the right approach.
If you’ve ever gotten a quote for professional headlight cleaning, you know how expensive it can be. But here’s what most people don’t realize: those cloudy, yellowed headlights that make your car look 10 years older can be restored to nearly new condition in your driveway.
As car care researchers who’ve tested dozens of methods and products, we’ve discovered that the best DIY solutions often outperform what you’d get at a shop.
In this guide, we’ll show you exactly which methods work, which kits are worth buying on Amazon, and how to keep your headlights crystal clear for years. Whether you’re working with a $5 toothpaste hack or a $25 restoration kit, you’re about to save serious money while getting professional results.
Why Car Headlights Get Foggy or Yellow
Your headlights didn’t start out looking like frosted glass. Something happened to them over time, and understanding what went wrong is the first step to fixing it permanently.
Modern headlights are made from polycarbonate plastic instead of old-school glass. This material is lighter, safer, and cheaper to manufacture, but it has one major weakness: it breaks down when exposed to the elements. Here’s what’s actually happening to your headlights.
1. UV rays cause oxidation.
Think of your headlights like your skin at the beach. Just as the sun damages your skin over time, UV rays slowly destroy the outer layer of your headlight lens. This process is called oxidation, and it’s why foggy headlights are more common in sunny climates like Arizona and Florida.
The polycarbonate plastic has a thin protective coating from the factory, but UV rays gradually wear it away. Once that protection is gone, the plastic itself starts to yellow and become cloudy. It’s not dirt you can simply wash off, it’s actual damage to the plastic.
2. Daily Driving Takes Its Toll
Every time you drive, your headlights get hit with a cocktail of harmful stuff. Road salt in winter, bug splatter in summer, and tiny bits of sand and debris act like sandpaper on your headlight surface. Even car washes can make the problem worse if they use harsh chemicals or rough brushes.
Highway driving is especially hard on headlights. At 65 mph, even a small pebble can create microscopic scratches that give dirt and grime more places to stick.
3. The plastic itself wears out
Every car will eventually develop foggy headlights. It’s not a matter of if, but when. Most vehicles start showing noticeable cloudiness after 5-7 years, regardless of how well you take care of them.
As the polycarbonate ages, it becomes more porous and brittle. This makes it absorb more dirt and moisture, which speeds up the yellowing process. It’s like a snowball effect, once it starts, it gets worse faster.
4. Moisture sneaks inside
Sometimes you’ll see condensation inside your headlight housing. This happens when the seals around the headlight start to fail, usually due to heat cycles from turning your lights on and off. That trapped moisture creates the perfect environment for more damage.
Even if you don’t see water droplets inside, humidity in the air can penetrate the microscopic pores in damaged plastic, making the cloudiness worse over time.
How To Clean Car Headlights At Home
1. Toothpaste and Baking Soda Method
This is probably the most famous DIY hack on the internet, and it actually works just not as well as most people hope.
What You’ll Need:
- Regular toothpaste (non-gel, whitening varieties work best)
- Baking soda
- Clean microfiber cloth
- Water for rinsing Spray bottle (optional)
How to Do It:
- Start by washing your headlights with soap and water to remove surface dirt. Make sure they’re completely dry before you begin.
- Squeeze about a tablespoon of toothpaste directly onto the headlight lens. If you want extra cleaning power, sprinkle just a pinch of baking soda over the toothpaste. Too much baking soda can scratch softer plastic.
- Using your microfiber cloth, scrub the entire headlight in small circular motions. Apply firm pressure, but don’t press so hard that you’re straining your arm. You should feel the toothpaste working as it creates friction against the oxidized surface.
- Work in sections for about 2-3 minutes per headlight. The toothpaste will start to look dirty as it picks up the yellowed plastic residue. That’s exactly what you want to see.
- Rinse thoroughly with clean water and dry with a fresh cloth. If one round didn’t get all the cloudiness, repeat the process. Most moderately foggy headlights need two applications to clean car headlights effectively.
According to AAA Club Alliance, regular toothpastes contain enough abrasive elements to scuff away the yellow film that develops on old headlights while being gentle enough not to scratch the plastic coating. However, the results typically last only 1-2 months before the haziness returns.
Pros:
- Costs under $3 using stuff you already own
- Works on light to moderate cloudiness
- No special tools required
- Safe for most headlight types
Cons:
- Results fade quickly (expect to repeat every 2-3 months)
- Won’t work on heavily oxidized headlights
- Provides no UV protection
- Can be messy and time-consuming
- You’ll need to do this task every year, if not multiple times per year
READ ALSO: How to Clean Your Car Engine without Risking Damage
2. Vinegar and Baking Soda Combo
This kitchen cabinet duo creates a mild acid reaction that can eat away at light oxidation. It’s gentler than toothpaste but takes more patience to see results.
Making The Paste:
Mix 2 tablespoons of baking soda with just enough white vinegar to form a thick paste. Don’t dump all the vinegar in at once, it’ll foam up and make a mess. Add it slowly, stirring as you go, until you get a consistency like thick peanut butter.
How to Apply:
- Clean your headlights with soap and water first. Spread the paste evenly across the entire headlight lens using your fingers or a soft cloth. Let it sit for 10-15 minutes while the acid works on the oxidation.
- Scrub gently with a microfiber cloth in circular motions, then rinse completely with water. The paste will neutralize itself, so you don’t need to worry about acid damage, but make sure to rinse thoroughly anyway.
When This Method Works Best:
This combo is perfect for headlights with very light yellowing or recent oxidation buildup. If your car is 3-5 years old and the headlights just started looking dull, this approach might be all you need to make headlights clear again.
It’s also great as a maintenance step between more aggressive cleaning methods. Use it every 3-4 months to slow down the oxidation process and keep headlights clean longer.
Don’t bother with this method if your headlights are heavily yellowed or have that thick, cloudy film. The acid isn’t strong enough to cut through serious oxidation, and you’ll just waste your time.
3. The WD-40 Method
WD-40 is basically a penetrating oil that fills in microscopic scratches and temporarily masks the surface damage on your headlights. When you spray it on and wipe it around, it creates a smooth, clear coating that light can pass through easily.
How it works:
The process is dead simple: spray WD-40 directly onto a clean cloth (never spray it directly on the headlight), then wipe it across the entire lens surface. Use circular motions and make sure you cover every inch. The cloudiness will disappear almost instantly.
Why It’s Not a Long-Term Solution:
WD-40 doesn’t actually clean car headlights, it just hides the problem temporarily. The oil coating will attract dirt and bugs, and within a day or two, your headlights will look worse than before.
Think of it like putting makeup over acne. It looks great in the mirror, but you haven’t fixed anything underneath. The oxidation is still there, waiting to show up again as soon as the oil wears off or gets washed away.
When to Use This Method:
WD-40 is perfect for emergencies. If you’re about to sell your car, take it for inspection, or need it to look good for photos, this 5-minute fix can buy you some time. Just know that you’ll need to clean it properly later.
It’s also useful for seeing what your headlights could look like with proper restoration. The temporary clarity shows you whether it’s worth investing in a real cleaning method or if your headlights are too far gone and need replacement.
Fair Warning:
Some people worry that WD-40 might damage rubber seals or plastic trim around the headlights. While we haven’t seen verified cases of damage, it’s smart to mask off the surrounding area with painter’s tape if you’re concerned. Also, never use this method right before applying a real restoration kit, the oil residue will prevent proper bonding of protective coatings.
The Professional Finish: Sandpaper + Restoration Kit
Wet Sanding and Polishing: Step-by-Step
This is the only method that can truly make headlights clear again when they’re severely damaged. You’re essentially performing plastic surgery on your headlights.
What You’ll Need:
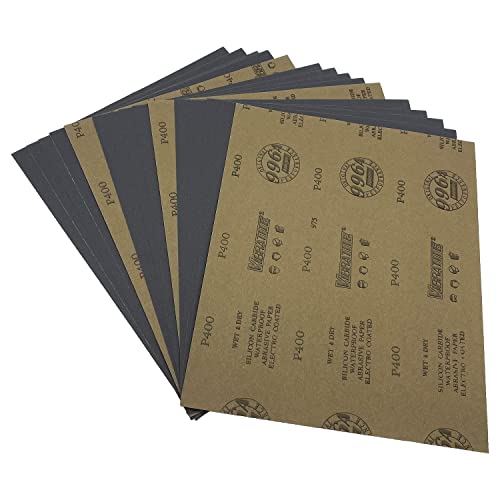
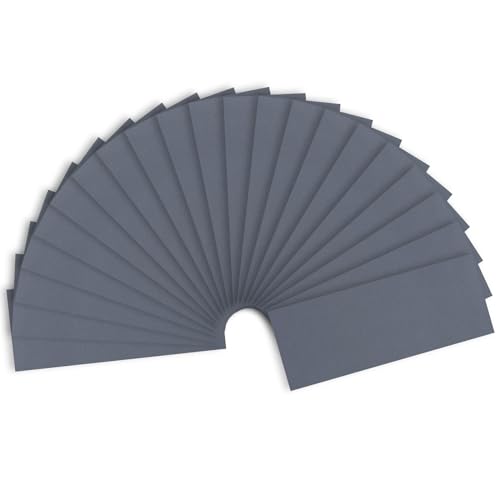
- Automotive wet sandpaper: 400, 800, 1500, and 3000 grit
- Spray bottle filled with clean water
- Clean microfiber cloths (grab at least 4)
- Automotive polish or rubbing compound
- UV-protective sealant or clear coat
- Masking tape (2-inch width works best)
- Safety glasses
Safety first. Put on safety glasses. Sanding creates tiny plastic particles that love to find your eyes. Work in shade. Direct sunlight makes it impossible to see your progress and heats the plastic, which can cause cracking.
Step 1:
Mask and Clean: Tape off everything around your headlights. Trust me, you don’t want polish and plastic dust on your paint. Wash the headlight with soap and water, then dry it completely.
Step 2:
400 Grit – The Demolition Phase: Soak your 400-grit sandpaper in water for 5 minutes. This coarsest grit does the heavy lifting, removing all the oxidized plastic.
Start sanding in straight horizontal lines across the entire headlight. Keep both the sandpaper and headlight surface wet at all times, and spray water every 15-20 seconds. Use steady, moderate pressure, like you’re trying to erase something stubborn.
Your headlight will look absolutely terrible after this. Don’t worry that uniform cloudiness means you’re doing it right. Spend about 4 minutes per headlight here.
Step 3:
800 Grit – Smoothing Things Out: Switch to 800 grit and sand vertically this time (perpendicular to your previous strokes). This removes the scratches from the 400-grit. Keep everything soaking wet and maintain steady pressure.
You should start seeing some improvement in clarity during this 3-minute step.

Step 4:
1500 Grit – Getting Closer: Back to horizontal strokes with the 1500 grit. The headlight should be looking much clearer now, though still not perfect. This finer sandpaper is preparing the surface for the final polish. Keep the water flowing.

Step 5:
3000 Grit – The Finishing Touch: Final sanding with 3000 grit in vertical strokes. This ultra-fine paper creates the smooth surface you need for a professional finish. The headlight should be nearly crystal clear at this point.
Step 6:
Polish Away the Haze: Clean off all the sanding residue with a damp cloth. Apply a small amount of automotive polish to a clean microfiber cloth and work it into the headlight using circular motions. The remaining haze should disappear, leaving you with a mirror-like finish.
Step 7:
Apply UV-protective sealant exactly as directed on the package. This clear coating is what will clean car headlights long-term and prevent you from having to repeat this entire process in six months.

Best Headlight Restoration Kits (2025 Picks)
If you want professional results, a quality restoration kit is your best bet. These kits give you everything you need to clean car headlights like a pro.
Sylvania Headlight Restoration Kit
Around $15-20 on Amazon
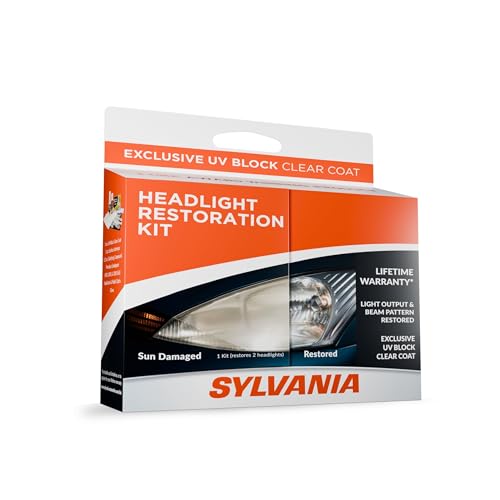
In terms of improving clarity, Sylvania was hands down the most effective of the headlight restoration kits we tested. This kit consistently outperforms more expensive options and includes everything you need for lasting results.
What’s in the box: Pre-measured liquid compounds labeled “Step One” and “Step Two,” sanding pads, and a UV-blocking clear coat. The instructions are foolproof, and the liquid compounds take the guesswork out of mixing ratios.
Best for: Moderately to severely oxidized headlights. This kit can make headlights clear again even when they look completely hopeless.
Meguiar’s Heavy Duty Headlight Restoration Kit
Price: Around $25-$30 on Amazon

Meguiar’s Heavy Duty Headlight Restoration Kit removes heavy oxidation, cloudiness and surface scratches, while delivering a crystal clear finish to restore headlights. It is ideal for severely oxidized, neglected or yellowed car headlights.
What makes it special: This kit uses sanding discs instead of liquid compounds, giving you more control over the process. It includes 1000 and 3000 grit pads plus a finishing compound and protective coating.
Best for: DIYers who want to understand the full restoration process and don’t mind spending extra time for perfect results.
Turtle Wax Headlight Cleaner
Around $8-12 on Amazon
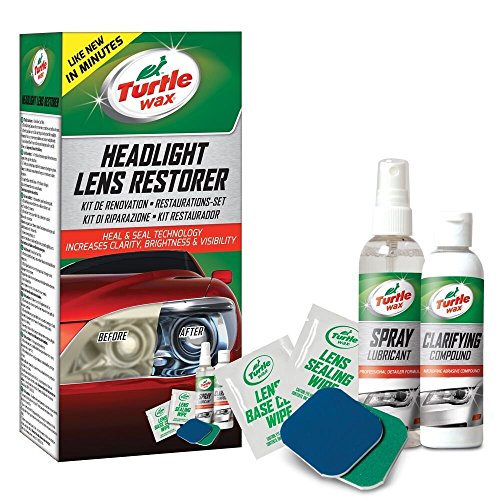
The least expensive product we tested, the Turtle Wax Lens Restorer improved our lenses almost as well as the top-performing Sylvania product, but it did not last as long.
What you get: Six-step process with individual packets for each stage. It’s more work than other kits, but the results are surprisingly good for the price.
Best for: Light to moderate oxidation when you want decent results without spending much money. Just know you’ll probably need to repeat the process more often.
What to Look for in a Good Kit
UV Protection is Non-Negotiable
The biggest difference between a $10 kit and a $25 kit is usually the UV protective coating. Cheap kits might clean car headlights effectively, but without proper UV protection, you’ll be back where you started in six months.
Look for kits that specifically mention UV blocking, clear coat, or protective sealant. This coating is what will keep headlights clean long-term.
Abrasiveness That Makes Sense
Good kits start with coarse abrasives to remove heavy oxidation, then gradually move to finer grits for polishing. Avoid kits that only include one type of pad or compound, you need multiple stages for professional results.
The best kits will have at least two different abrasive levels, plus a polishing compound and protective coating.
Ease of Use
Complex kits with confusing directions lead to poor results and frustration. The best kits have numbered steps, clear timing instructions, and photos showing what to expect at each stage.
If the instructions look overwhelming or unclear, skip that kit. You want something that builds your confidence, not destroys it.
Realistic Expectations
Even the best kit won’t make 15-year-old headlights look factory-new, but they should deliver dramatic improvement. Quality kits typically restore 80-90% of original clarity on moderately damaged headlights.
Most kits work on one pair of headlights, though some larger kits can handle 2-3 cars. Check the coverage before buying if you’re planning to restore multiple vehicles.
READ ALSO: Essential Oils vs Air Fresheners; Which is better for your Car’s Interior
Pro Tips to Keep Clean Car Headlights Longer
Preventing headlight damage is way easier than fixing it. Once you’ve put in the work to make headlights clear again, these simple habits will keep them looking good for years instead of months.
Apply UV Protection
After you clean car headlights with any method, applying a UV sealant should be your next move. Consider it sunscreen for your headlights, it blocks the UV rays that cause most of the damage in the first place.
Quality automotive UV sealants cost $10-15 and take 10 minutes to apply. Popular options include Meguiar’s Endurance Tire Gel (works great on headlights too) or Chemical Guys Headlight Restorer and Protectant. Just spray it on, wipe it around with a microfiber cloth, and you’re done.


For maximum protection, consider clear protective film. It’s basically a transparent sticker that goes over your entire headlight. Professional installation runs $100-150 per pair, but the film lasts 5-7 years and prevents almost all oxidation damage. If you’re planning to keep your car long-term, it pays for itself.
Park Under Shades or Use Covers
UV rays are the main enemy of clear headlights, so where you park is very important. Even small changes in where you park can add years to your headlights’ lifespan.
Whenever possible, park in covered areas: garages, carports, or even under large trees. If you have to park outside, try to position your car so the front faces north. This minimizes direct sun exposure during the hottest parts of the day.
Car covers work too, but only if you’ll actually use them consistently. If you go this route, get a lightweight, breathable cover that’s easy to put on and take off.

Monthly Maintenance
This is the easiest way to keep headlights clean without major restoration projects. Once a month, give your headlights a quick wipe-down with a plastic-safe cleaner.
Avoid household cleaners like Windex or 409; they contain ammonia that can damage the plastic over time. Instead, use automotive plastic cleaner (around $5 at any auto parts store) or even diluted car soap.
Spray the cleaner on a microfiber cloth, not directly on the headlight, then wipe in circular motions. This removes surface contamination before it has a chance to bond with the plastic. The whole process takes about 5 minutes and prevents most of the buildup that leads to major restoration projects.
Reapply Protection Regularly
Here’s where most people mess up: they think one application of UV sealant lasts forever. It doesn’t. Most sealants start losing effectiveness after 6-8 months of normal driving.
Set a reminder in your phone to reapply UV protection twice a year. Spring and fall are good times since you’re probably doing other car maintenance anyway. The second application takes even less time than the first since you’re just refreshing existing protection.
If you notice any haziness starting to develop, don’t wait for your scheduled reapplication. A quick touch-up with UV sealant can prevent minor cloudiness from becoming a major restoration project.
When to Skip DIY and Call a Pro
Sometimes the best DIY advice is knowing when not to DIY. While most headlight problems can be fixed at home, certain issues require professional help or complete replacement. Here’s how to tell when your restoration project has hit its limits.
Deep Internal Fogging
If you see condensation or water droplets inside your headlight housing, no amount of external cleaning will help. This internal fogging happens when the seals around your headlight fail, letting moisture creep inside where it doesn’t belong.
You’ll know it’s internal fogging if the cloudiness doesn’t improve when you wipe the outside surface, or if you can actually see water droplets floating inside the headlight assembly. Sometimes this moisture creates a swirling, milky pattern that looks different from regular oxidation.
DIY fixes for this problem usually make it worse. Drilling holes to “let moisture escape” or trying to remove the headlight housing yourself often leads to expensive mistakes. Professionals have the tools to properly reseal headlight assemblies and remove internal moisture without damaging sensitive components.
Professional moisture removal typically runs $75-150 per headlight, which is still cheaper than replacing the entire assembly.
Cracked Headlight Housing
Any visible cracks in the headlight housing are a hard stop for DIY restoration. Even hairline cracks can let moisture in and compromise the structural integrity of the headlight. More importantly, cracked housings can fail completely, leaving you with broken plastic and exposed bulbs.
You might be tempted to clean car headlights around the crack and hope for the best, but this is one area where safety trumps savings. Cracked housings need professional assessment to determine if they can be properly repaired or need complete replacement.
Some cracks are just surface damage to the outer lens, while others go deep into the housing structure. Only a professional can tell the difference and recommend the safest repair approach.
Repeated Oxidation
Here’s the frustrating scenario: you successfully make headlights clear again using proper techniques and quality products, but the cloudiness keeps coming back within 3-4 months no matter what you do.
This usually means the plastic itself has degraded beyond what DIY methods can handle. After years of UV damage, some headlight plastic becomes so porous and brittle that it can’t hold protective coatings properly. You end up in an endless cycle of cleaning and re-cleaning.
Professional shops have access to industrial-grade coatings and preparation methods that aren’t available to consumers. They can also perform deeper surface preparation that goes beyond what home restoration kits can achieve.
If you’ve restored the same headlights three times in two years, it’s time to call in the pros or consider replacement.
Other Red Flags for Professional Help
Electrical issues are always pro territory. If your headlights flicker, dim unexpectedly, or have alignment problems, there might be wiring or mounting issues that need expert diagnosis.
Similarly, if your headlights have aftermarket modifications, HID conversions, or custom housings, stick with professionals who understand these systems. DIY restoration techniques designed for standard halogen headlights might not work properly on modified setups.
Cost / Value
Professional headlight restoration typically costs $100-200 per pair, while complete replacement can run $300-800, depending on your vehicle. Before calling a pro, consider your the age of your car and the value.
If your car is worth less than $5,000, investing in professional restoration might not make financial sense. But if you’re planning to keep the vehicle for several more years, professional work often lasts longer than DIY fixes.
Finding the Right Professional
Look for auto detailing shops or body shops that specifically mention headlight restoration services. Ask to see before-and-after photos of their work and inquire about warranty coverage.
Avoid chain quick-lube places that offer headlight restoration as an add-on service. This specialized work requires proper equipment and experience that general service centers often lack.
Clean Car Headlights Methods Comparison Chart: DIY vs. Kits vs. Pro Services
| Method | Cost | Time | Difficulty | Lasting Result |
| Toothpaste | Low | 10m | Easy | Short term |
| WD-40 | Very low | 5m | Very easy | Very short term |
| Kits | Medium | 20-40m | Moderate | 6-12 months |
| Pro services | High | 1-2h | None | 1-2 years |
For a quick fix, WD-40 gives instant results in about 5 minutes. Just spray it on a cloth and wipe across the headlight surface. However, this is purely cosmetic and lasts less than 24 hours.
For a real solution, the toothpaste method is your fastest legitimate option. It takes 15-20 minutes per headlight and works on light to moderate cloudiness. You’ll need regular (non-gel) toothpaste, a microfiber cloth, and some elbow grease.
If you want speed and lasting results, grab a restoration kit. Most take 30-45 minutes total, but give you results that last months instead of hours.
It depends entirely on the method you use and whether you apply UV protection afterward:
– Toothpaste or baking soda methods: 1-3 months
– Quality restoration kits with UV sealant: 6-12 months
– Professional restoration: 1-2 years
The key factor is UV protection. Without it, even perfect restoration work will start clouding again within months. With proper UV sealant, you can make headlights clear again and keep them that way for years.
For maintenance cleaning, wipe down your headlights monthly with plastic-safe cleaner. This prevents dirt and contamination from bonding to the surface and keeps headlights clean between major restorations.
The best approach is to check your headlights every few months. If you notice any yellowing or dullness starting, address it immediately with a quick restoration kit. Catching oxidation early means easier fixes and longer-lasting results.
Not always. Price doesn’t guarantee results in headlight restoration.
The real difference is usually in the UV protection included. Cheap kits might clean car headlights effectively, but skip the protective coating that prevents rapid re-oxidation.
Focus on what’s included rather than price. Good kits have multiple abrasive stages, polishing compound, and UV-blocking sealant. If a kit doesn’t mention UV protection, keep shopping regardless of price.
Skip them. Most car wash headlight services use harsh chemicals or aggressive brushes that can actually make cloudiness worse. They’re designed for speed, not quality results.
If you want professional results, go to a dedicated auto detailing shop that specializes in headlight restoration. They’ll have proper equipment and take the time to do it right. Car wash add-on services are usually just expensive disappointments.
Conclusion
When you clean car headlights properly, you’re investing in your safety and everyone else’s on the road.
The good news is that you don’t need to be a mechanic or spend hundreds of dollars to get professional results. Whether you choose the $3 toothpaste method for light cloudiness or invest in a $25 restoration kit for serious oxidation, DIY solutions can make headlights clear again when you follow the right steps.
But here’s what separates successful DIY projects from frustrating repeat jobs: maintenance. The difference between headlights that stay clear for months versus years comes down to UV protection and simple upkeep. Apply a quality sealant after restoration, park under shades when possible, and give your headlights a monthly wipe-down. These small habits will save you hours of restoration work down the road.
Drop a comment below and let us know which of these methods you’re going to try. Or if you’ve applied any of these methods, share your results in the comments section below.